
DIY: 5 Steps to Bible Journaling for Beginners (Step by Step Hand Lettering)
DIY:
5 Steps to Bible Journaling for Beginners (Step by Step Hand Lettering)

Welcome to my NEW From the Heart Art Blog, where I'll be sharing weekly inspiration to share, uplift & encourage you on your journey!
From stories behind the art I create to behind-the-scenes looks into the creations process to DIY tutorials and more... I will be posting a new blog post every single Wednesday to share, uplift, & encourage you on your journey! Welcome to the blog & I can't wait to connect with you through this new blog space every single week. If you want to know when new blog posts go live, make sure to join our exclusive email newsletter community! Pssst... as part of my exclusive email subscriber community, you'll also get first looks into sales & specials, too!
Why to Start Bible Journaling...
I use lettering as a way to illustrate Bible Verses that I’m studying or the ones that just speak to me. Slowly writing each letter gives me time to focus on the word and think about what the word means and prayerfully ask the Holy Spirit how do I need to apply it to my life.
This process has been so good for my brain and for my heart! Reading the verse and then slowly writing the verse really helps my brain work to understand and remember the verse. Slowly and prayerfully focusing on each word helps my heart be open to the Spirit for understanding and sometimes, even correction.
This process is a time that I focus on God and His Word, which helps me turn my focus OFF my little world and get my eyes back on Him…. For me this process is a form of worship, it is a very precious time of realigning my heart and mind to Truth. I would love to introduce you to it.

Things You'll Need to Get Started...
- Bible, Devotional Book, Hymnal or Lyrics to a song
- Pencil
- Eraser
- Erasable Pens and/or Markers (variety of colors)
- Highlighters (I like a variety of colors)
- Dotted or lined paper


Step One: Read the Bible
It begins while reading my Bible, devotional, hymnal, or lyrics to a song. If it’s a Bible verse, I will often look up that verse in several different translations. If the word is burning on my heart I will also get out the dictionary and start looking up it’s definition.

Step Two: Highlight the Part(s) that Stand Out to You
I will then use a highlighter to highlight the parts that spoke to me. I often use several different colors and will code the words.
Here’s an example: I might circle the words that refer to God or His promise or plan in a specific color and then underline in a different color the words referring to me or my part. With a different color I will circle or underline any words that I think my heart or mind needs to focus on.

Step Three: Choose Your Writing Utensils & Paper...
Time for the paper and writing utensils. Dotted paper is my friend! I can not write straight to save my life! Although I prefer dotted paper, lined paper works fine if I don’t have the dotted paper with me. My daughters usually give me dotted journals for birthdays and Christmas, they know I use a lot of it!
So if dotted paper is my friend, erasable pens & markers are my best friends! It was a happy day when I was introduced to these fun tools. I can write in colorful pens AND have the ability to erase mistakes or rearrange words.
Important Tip: One important note, erasable pen will disappear when in the heat. So if you leave your journal or notes out in a hot car, you might have blank paper when you get back!
If I don’t have erasable pens, I will use a pencil with an eraser, and if I don’t have that, I’ll just use a regular pen or even a marker.


Step Four: Start Writing with the Focal Point First...
By now I know which part of the verse needs to be the focal point, so I will imagine how it needs to be placed on the page to allow room for the words before and after the verse to also fit.
Sometimes I will write the focal word first and then work the other words around it. Depending on the circumstances I will begin immediately writing with my pen but most often, I pencil the words first. The next step is to use my pencil to thicken the letters of the focal words.


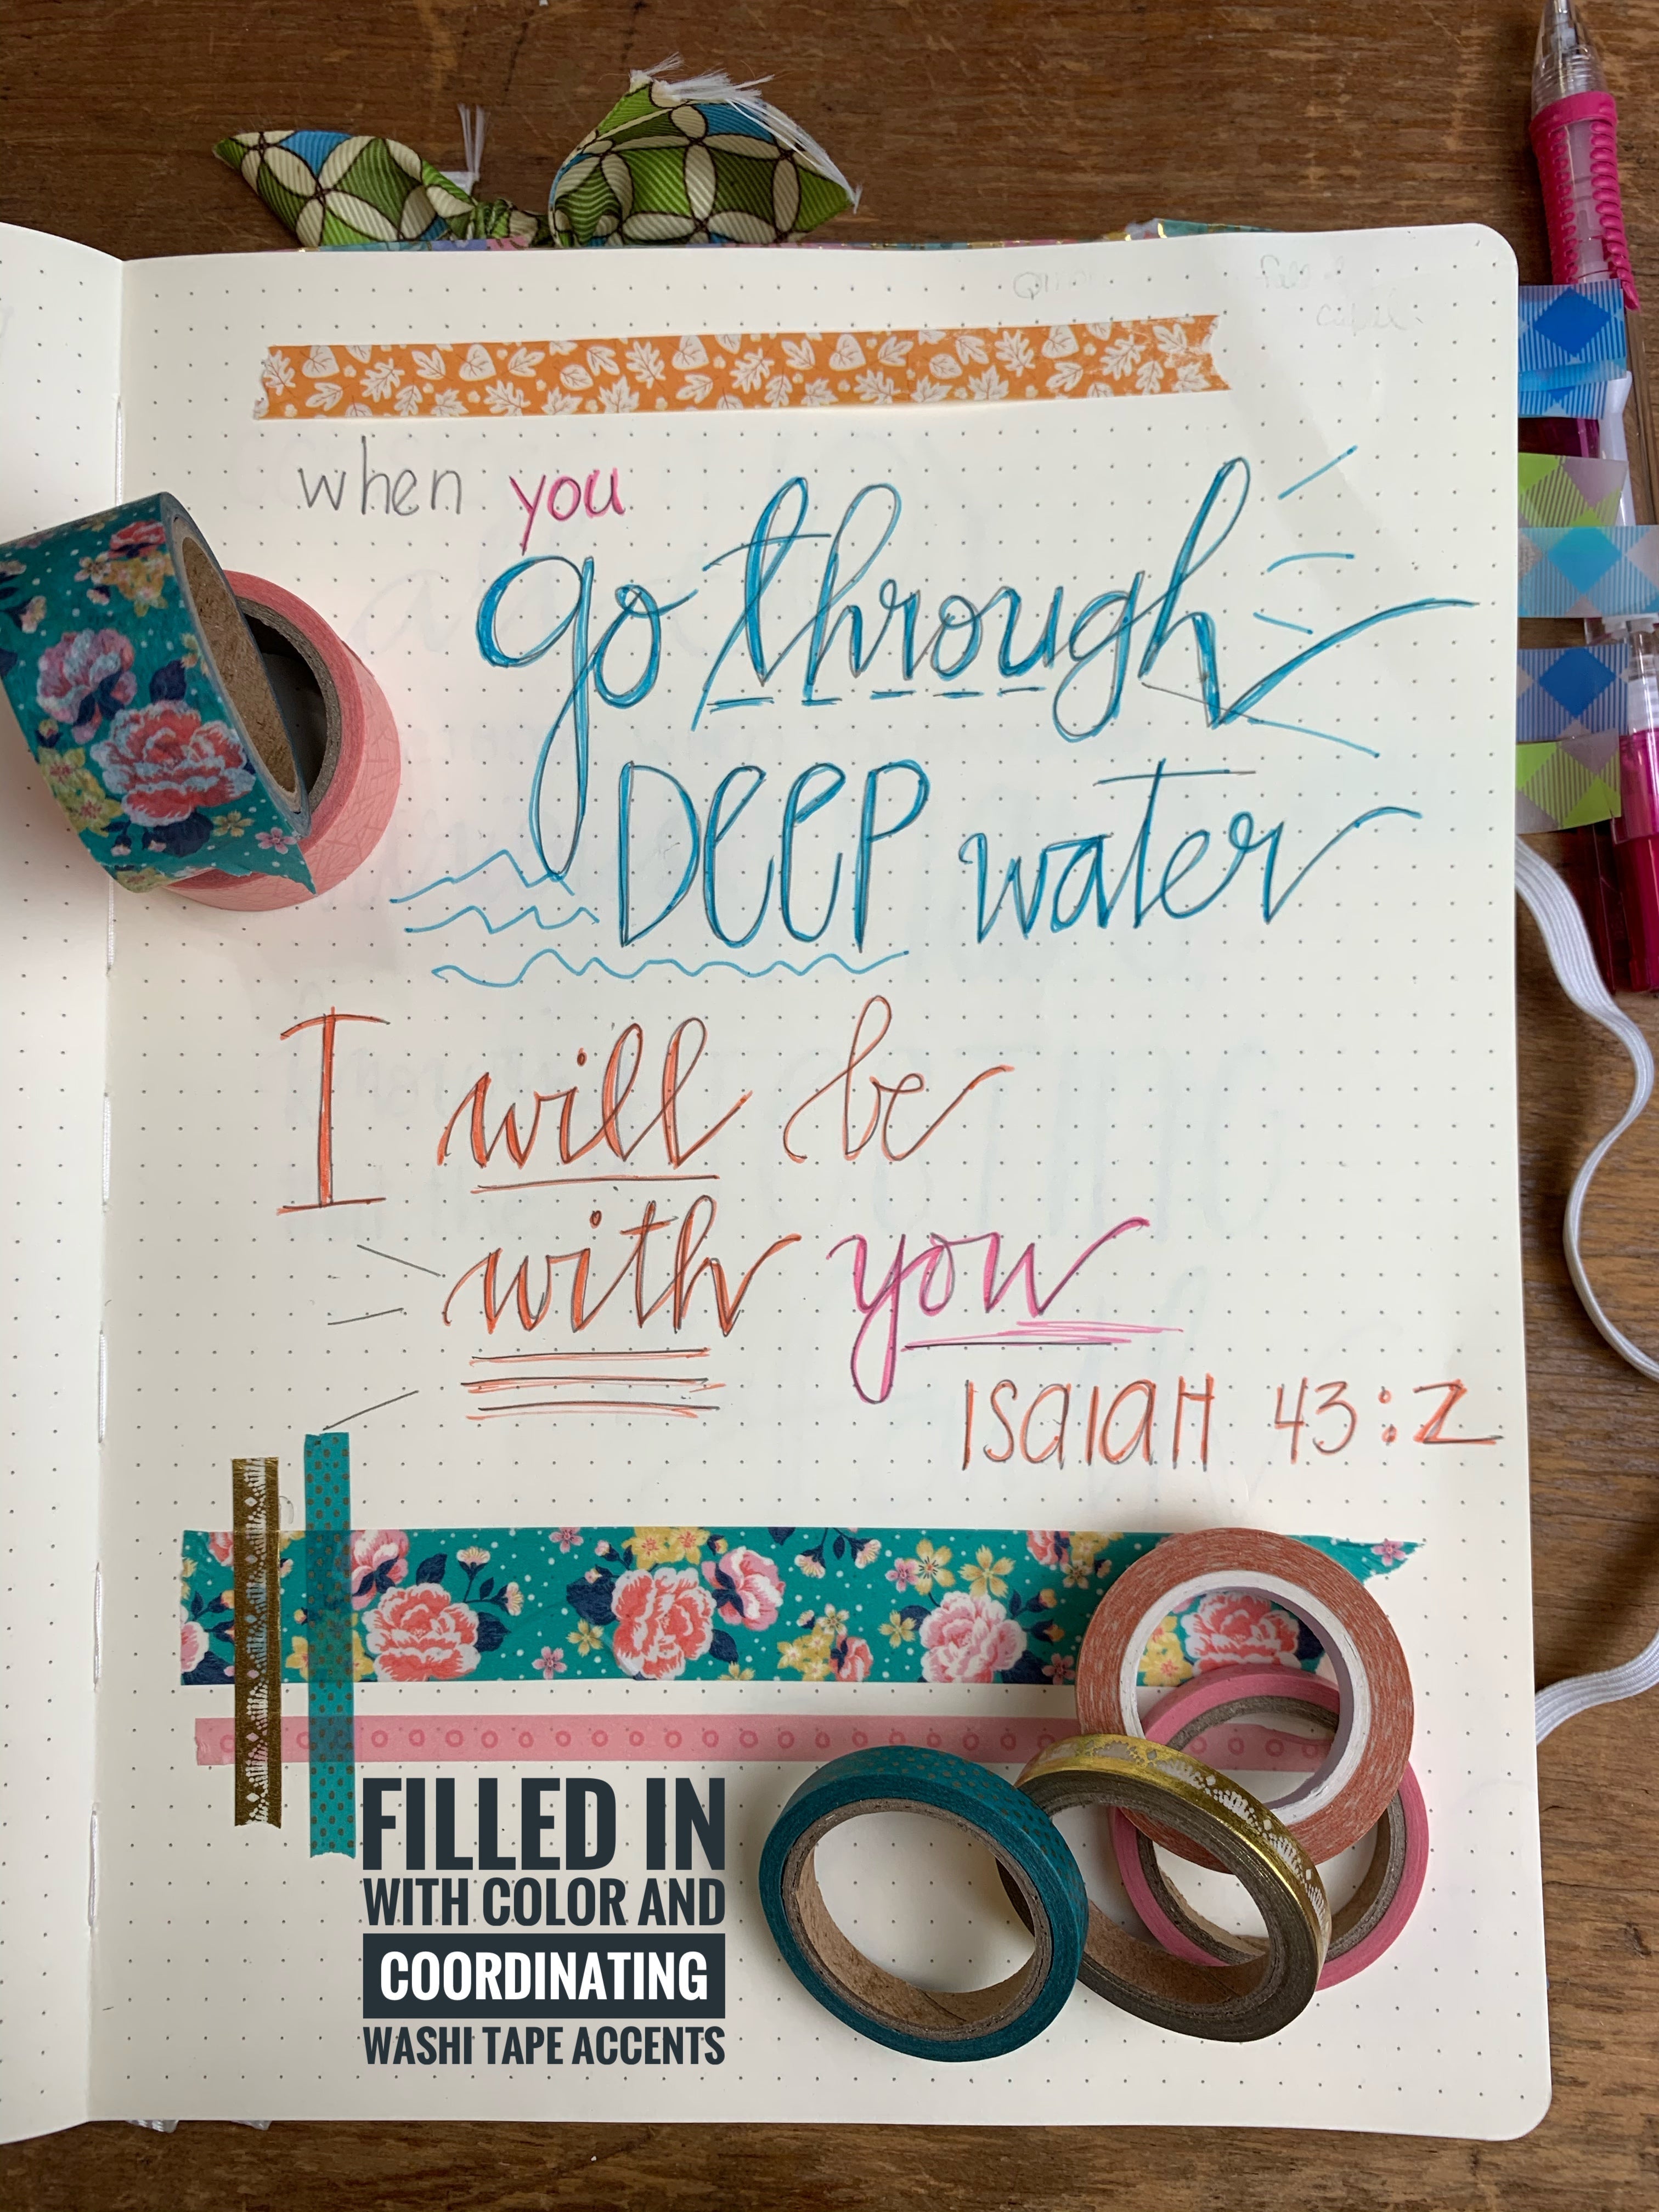
Step Five: Then Add Color!
Now, I add color. I really love washi tape and really enjoy color coordinating my pen colors to the washi tape that I’m using. I like to fill in the thickened letters and add accents like dashes, squiggly lines, stars, etc… anything that will help my brain get the reminder “Hey this word is important!”
In these photos from my scripture prayer journal, I’ve used a pen for the color. I have a pencil pouch that I like to store all of my erasable pens and markers. I even take my journal and pouch to church with me. So many times I will use it to record words from hymns & songs and even scripture passages we look up during the sermon.

A Quick Step-By-Step Hand Lettering DIY Tutorial:
A simple visual breakdown of writing a word in cursive and enhancing it with a downstroke
Step 1: Write the word in cursive. Choose to write it vertically or with a slant.

Step 2: Add a second line to represent the downstroke. This takes a little practice to get the hang of it, but is basically adding a second line where you wrote in a downward direction.

Step 3: If you began in pencil, you can now add color by tracing over your letters in pen or maker. Fill in the double line area to make that part of the letter thicker.

Step 4: Once the ink or marker is dry, lightly erase your pencil marks.
These scripture journals are an important part of my story. I hope to fill as many journals as possible with beautiful colorful reminders of Truth! My heart and mind desperately needs these reminders! The exercise of reading the verses, then writing them and then re-reading what I’ve lettered helps my heart tremendously. I hope you will give it a try! I think you will be greatly encouraged!
Sincerely, Pam Coxwell | From the Heart Art
Leave a comment